There’s something genuinely satisfying about being the person who can make a proper cocktail at home. Not the kind where you dump two things into a glass and hope for the best, but the kind where you measure, shake, strain, and hand someone a drink that tastes like it came from a bar. The good news is that doing this well does not require a dedicated room, a wall of rare bottles, or a Rs 20,000 bar cart. It requires a bit of planning, a short shopping list, and the right starting point. If you’ve been meaning to set up a home bar but keep getting overwhelmed by the options, this is the guide that’ll help you actually do it.
Step One: Figure Out Your Space
Before you buy a single thing, decide where your bar is going to live. This one decision shapes everything that follows — what furniture you need, how many bottles you can store, and how the whole thing looks.
The honest truth is that you don’t need much space at all. Some of the best home bars start with a shelf, a few well-chosen bottles, and the right accessories. In the Indian context, where most of us are working with apartments that have limited floor space, there are a few setup options that work very well.
The shelf bar is the simplest and most budget-friendly approach. Clear off a section of a kitchen counter, a shelf in the living room, or the top of a bookcase. Dedicate that space entirely to your bar. A bar mat to define the mixing zone, a few bottles grouped, and you have something that looks intentional rather than accidental. This works brilliantly in 1BHK apartments.
The bar cart is the next step up, and it has the advantage of doubling as decor. A two-tier trolley-style cart gives you a visible, mobile bar setup that can be wheeled out when guests arrive and tucked into a corner when not in use. Ikea, Pepperfry, and Urban Ladder all carry bar carts and serving trolleys in the Rs 4,000 to Rs 12,000 range that work perfectly for this.
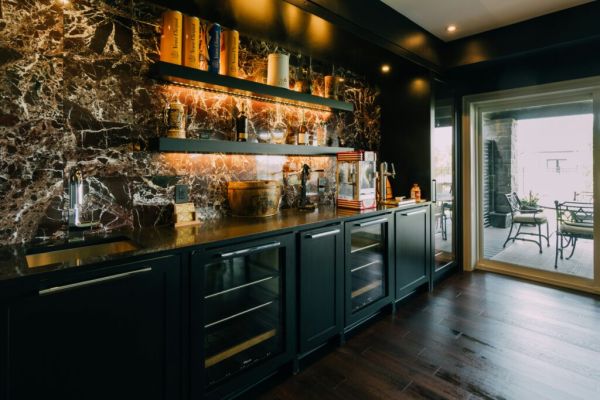
The dedicated cabinet or sideboard is the most functional option if you’re serious about hosting regularly. A deep shelf cabinet with a few hooks for hanging glasses and a flat top surface for mixing is close to perfect. A lot of people also convert an old bookcase or a vintage wooden cabinet into a bar with great results. The key is simply having enough counter space to work on.
Whatever you choose, keep it tidy. A tidy bar with five bottles looks better than a cluttered bar with fifteen. Quality over quantity, always.
Step Two: The Tools You Actually Need

This is where most beginners go wrong. You go online looking for a cocktail shaker and suddenly you’re watching YouTube videos about Japanese jiggers and smoking guns and a “complete 15-piece bartender kit” for Rs 999 from Amazon that will break in two weeks. Let’s cut through that.
Start with 3 bottles, 2 glass types (highball and lowball), and 4 tools: a shaker, a jigger, a strainer, and a muddler.
Here’s what each tool actually does:
Cocktail shaker: The three-piece cobbler shaker with a built-in strainer is the best option for beginners. It’s easier to manage than a Boston shaker and you don’t need a separate strainer to go with it. A solid cocktail shaker is indispensable. It’s used for drinks that include juices, creams, or syrups, the kind that need more than just stirring. Get a stainless steel one. Brands like Dynore, THW, and Barworld India are all reliable.
Jigger or peg measure: This is the double-sided measuring tool, and it is far more important than most beginners realize. “I can eyeball it” is how you ruin cocktails and waste good alcohol. Measure your pours. Every time. Get a double-sided jigger with 30ml and 60ml measures (standard peg measures used in India) and internal markings for half quantities.
bar spoon: A long-handled bar spoon is used to stir drinks, Old Fashioneds, Manhattans, Martinis, without breaking the ice. It’s also useful for layered cocktails. Don’t skip this; you can’t stir a drink properly with a kitchen spoon.
Muddler: A muddler crushes herbs, fruit, and spices at the bottom of a glass to release their flavour. Essential for Mojitos and any gin or rum cocktail with fresh mint or citrus. Wood or stainless steel both work fine.
Hawthorne strainer: If you upgrade to a Boston shaker later, you’ll need this. But even with a cobbler shaker, a separate strainer gives you more control. The spring coil keeps ice and fruit pulp out of the final drink.
Citrus press: This one gets underestimated constantly. Freshly squeezed lime juice is not the same thing as bottled lime juice, and the difference in a Daiquiri or a Gimlet is unmistakable. A simple handheld citrus squeezer is enough to start.
Step Three: Glassware Without the Splurge

Shape determines aroma. Thickness changes the temperature. Design changes the vibe. All of that is true, and it’s also true that you do not need to spend Rs 800 per glass to experience it. Here’s a practical glassware guide for a starter Indian home bar:
Highball glass (tall glass): For long drinks, gin and tonics, rum and coke, whiskey with soda, mocktails. The most versatile glass you own. Get four to six of these first.
Lowball or rocks glass (short, wide glass): Also called an Old Fashioned glass. Used for whiskey neat or on the rocks, Old Fashioneds, and any short spirit serve. Get ones that feel solid in your hand. A good weight in the palm makes all the difference to how a drink feels.
Cup or balloon glass: The wide-bowled, stemmed glass made specifically for gin and tonic. The wide bowl concentrates the botanicals’ aroma and makes a G&T taste noticeably better. If gin is your thing, this is worth getting.
Stemmed cocktail glass or coupe: For Martinis, Daiquiris, and anything served “up”, shaken or stirred, then strained, with no ice in the glass. The stem keeps your hand from warming the drink. Any stemmed glass works; Don’t obsess over the exact shape.
Step Four: Stocking the Spirits

Here is where most beginner home bar advice goes off the rails. People recommend twenty bottles on day one, including a half-dozen spirits you’ve never tasted and liqueurs that’ll sit untouched for months. Ignore that.
Don’t buy 15 bottles on day one. Build your bar based on what you actually drink.
Start with three core spirits:
Whiskey: For most Indian households, this is the natural starting point. A mid-shelf Indian single malt or blended whiskey works perfectly, Johnny Walker, Indri, or Paul John Classic if you want to go slightly upscale. If you prefer Scotch, Teachers or Famous Grouse are affordable and versatile for cocktails.
White Rum: Essential for Mojitos, Daiquiris, and the classic Rum and Coke. Old Monk White is a budget pick; Bacardi or Captain Morgan White are slightly smoother and work better in cocktails.
Gin: London dry gin is the most cocktail-friendly style. Bombay Sapphire is widely available and genuinely excellent; Beefeater is slightly more affordable. For an Indian option, Greater Than or Hapusa are both fantastic and worth trying.
Once you have these three, you can make Mojitos, Daiquiris, Gin and Tonics, Gimlets, Whiskey Sours, and a dozen variations. If your crowd also drinks vodka, add one bottle, Absolut or Smirnoff both work well, and you’ve now opened up Cosmopolitans, Vodka Tonics, and Moscow Mules.
Two bottles that unlock a lot: Sweet vermouth and Campari, together with gin, you’ve got a Negroni. With whiskey, a Manhattan. Two bottles, four classic cocktails. The Negroni in particular is having a moment in India’s cocktail culture right now, and being able to make one at home will earn you genuine respect.
The one bitters you need: Angostura Aromatic Bitters. One small bottle costs about Rs 400 to Rs 600 and lasts for months. A few dashes in a Whiskey and Soda transforms it into something with actual character. It’s the secret ingredient in Old Fashioneds, Manhattans, and a dozen other classics, and nothing else quite replaces it.
Step Five: Mixers, Garnishes, and the Cheap Things That Matter Most

You have 5 bottles of spirits and zero soda, lime, or ice. Half your bar is unused. Mixers are cheap. Stock them.
Tonic water: Schweppes is the standard; Sepoy & Co. is an excellent Indian craft option at a slight premium. The quality of your tonic water matters far more than most people realize — it’s half of a G&T.
Soda water: Keep a couple of bottles. Bisleri soda works fine; a SodaStream, if you make a lot of long drinks, is worth considering eventually.
Fresh limes: Always fresh. Always. Bottled lime juice is not an acceptable substitute in cocktails. Buy a net of limes every week if you’re making drinks regularly.
Simple syrup: This is the one thing you can make for free at home. Combine equal parts sugar and water in a saucepan, heat until the sugar dissolves, cool and bottle. That’s it. You now have a key cocktail ingredient that bars charge Rs 150 for in tiny portions, and it costs you almost nothing.
Fresh mint: Essential for Mojitos, great in gin drinks. Grows easily on a balcony or windowsill if you want an unlimited supply.
ice: India is hot. Ice melts fast. Buy more than you think you need. Always. A silicone large ice cube mold is a very worthwhile purchase, large cubes melt more slowly and dilute drinks less, which makes a real difference in whiskey drinks and stirred cocktails.
Step Six: Make It Look Good Without Spending More

A home bar that looks good is more fun to use, and it impresses guests. A budget bar doesn’t have to look budget.
Group your bottles together rather than spreading them across the shelf. Cluster them at one end, tallest at the back, label facing outward. Add one decorative element, a small plant, a cocktail recipe book lying open, a framed print. One accent is enough; more than that starts to look cluttered.
If you have a decanter, use it. Decanting your whiskey into a beautiful glass vessel transforms a regular shelf into something that looks genuinely intentional. The Bar Collective, Nestroots, and Bar Box are Indian brands worth looking at for decanters and stylish bar accessories that won’t break the budget.
A good bar mat in stainless steel or leather-finish defines your mixing zone and immediately makes the setup look like someone thought about it. Think of it as the equivalent of a tablecloth, the thing that signals that this space has a purpose.
What Not to Buy (Yet)
A few things to avoid when you’re just starting:
They look like a deal; they feel terrible in your hands and fall apart within months. Buy fewer tools of better quality.
Specialty spirits you don’t have a plan for. That bottle of mezcal or Chartreuse sounds exciting, but if you only know one recipe that uses it, it’ll sit unopened. Master the basics first, then expand.
Expensive branded glassware before you’ve figured out what you actually drink. Crystal whiskey glasses look beautiful on Instagram, but you need a working shaker and jigger before you need aesthetic glasses.
Your First Bar
The best home bar is not the most expensive one. It’s the one you actually use. Start with what you drink, buy quality where it matters (tools and spirits), cut corners where it doesn’t (bar cart furniture, some glassware), and build gradually rather than all at once. The ritual of making a drink at home, measuring, shaking, garnishing, and handing someone something you made is one of the simple pleasures of adult life. It doesn’t need a big budget to feel special. It just needs a little intention.
-
CSK Vs RR: Rajasthan Royals Captain Riyan Parag Wins Toss, Opts To Bowl First Against Chennai Super Kings Amid Rain Threat

-
DA Hike 2026 Update: Central Govt Employees Await Dearness Allowance Boost, Announcement Likely in April

-
White Stuff's £59 spring jeans praised for 'supportive fit around the tummy'

-
Transform Your Garden with David Domoney's Dream Gardens Spring/Summer Special

-
Nazara Technologies seeks ₹500cr via warrants priced at ₹260 each