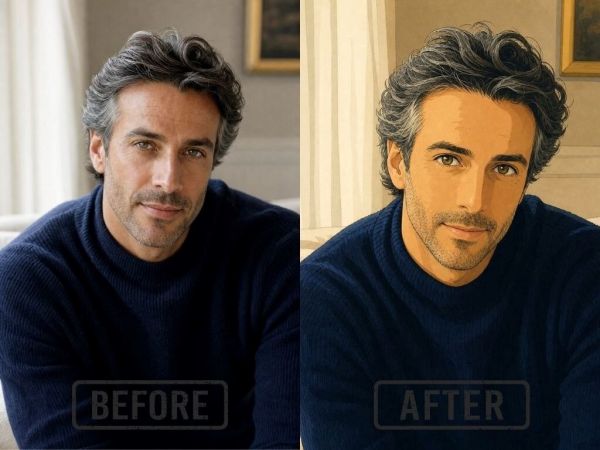
You likely have a phone full of photos that look fine but do not really stand out. You might want to turn a simple vacation shot into a classic oil painting or a vibrant neon poster. You can do this without any drawing skills or expensive software. AI technology allows you to take any image and change its style while keeping the original shapes and subjects intact. This process is called image to image generation, and it is becoming a standard tool for creators who want to refresh their visual content.
Using a high-quality AI photo editor is the easiest way to start this transformation. These tools use a process where the software looks at your original file and uses it as a guide for a new drawing or painting. You can choose from many different styles, such as 3D animation, pencil sketches, or even clay models. The AI identifies the edges and forms in your photo, which ensures the new version still looks like the original person or place.
You can find a Free Image to Image Generator to test these features without any cost. These generators are very simple to use even for beginners. You just need to upload your file and tell the AI what you want the new version to look like. The system handles the complex math and artistic choices for you, which makes the whole process very fast. You do not need to spend hours learning how to use layers or brushes.
Step 1: Choose a High Quality Base Image
The first step in transforming an image is picking the right starting point. The AI needs to see clear lines and distinct shapes to understand what it is looking at. If you upload a photo that is very blurry or dark, the AI might struggle to recreate it accurately. It might add strange shapes or lose the details of the subject.
Try to pick a photo with good lighting and a clear subject. For example, a portrait with a simple background works much better than a crowded group photo where everyone is far away. High resolution images are also better because they provide more data for the AI to analyze. If you start with a clear image, your final artistic result will look much more professional and polished.
Step 2: Upload and Select Your Tool
Once you have your photo, you need to upload it to your chosen platform. Most tools have a simple drag and drop interface. You will usually see a box labeled image to image or style transfer. When you upload your file, the software prepares it for the transformation process.
Make sure you are using a format that the tool supports. Most platforms accept JPG, PNG, and WEBP files. If your file is too large, you might need to resize it slightly before uploading. Once the image is in the system, you will be ready to move on to the creative part where you define the new style.
Step 3: Write Your Style Prompt
This is where the magic happens. A prompt is a short description that tells the AI what style to apply. You should be as specific as possible. If you just type painting, the AI might give you something very generic. Instead, try using descriptive words that define the texture, the medium, and the lighting.
For example, if you want a classic look, you could type vibrant oil painting with thick brush strokes and rich colors. If you want something modern, you could try futuristic cyberpunk style with blue and purple neon lights. The AI uses these words to decide how to redraw the pixels of your original photo. You can even mention specific artists if you want to mimic their unique style.
Step 4: Adjust the Influence Settings
Most AI tools have a slider that controls how much the new image should look like the old one. This is often called image strength or denoising strength. This setting is very important for getting the result you want. If the strength is too low, the AI will barely change the photo. If the strength is too high, the AI might ignore your original photo completely and create something totally different.
A good starting point is usually right in the middle. This allows the AI to change the textures and colors while keeping the shapes of your original photo. If you are doing a portrait and you want the person to stay recognizable, keep the strength a bit lower. If you are doing a landscape and you want a total artistic overhaul, you can turn the strength up higher.
Step 5: Generate and Save
After you have set your prompt and adjusted your settings, click the generate button. The AI will take a few seconds to process the image. You will see a new version of your photo appear on the screen. If you do not like the first result, you can usually click the button again to get a different variation.
When you are happy with the result, you can download the image to your device. Some tools also offer an upscaling feature. This is helpful if the generated image looks a bit small or pixelated. Upscaling uses AI to add more detail and make the image large enough for printing or sharing on high resolution screens.
Tips and Best Practices
To get the best results, you should experiment with different combinations of prompts and settings. Not every photo works perfectly with every style. Here is a table showing which styles work best with specific types of images.
| Style Name | Key Keywords | Best Image Type |
| Cyberpunk | Neon, futuristic, dark, rain | City streets |
| Watercolor | Soft, bleeding colors, paper texture | Flowers and nature |
| Pixel Art | 8-bit, retro, blocky, video game | Portraits |
| Oil Painting | Thick brush strokes, canvas, rich colors | Landscapes |
| Sketch | Pencil, charcoal, rough lines | Human faces |
You should also pay attention to the colors in your original photo. If your photo is mostly blue, a style that uses warm oranges and reds might look a bit strange. You can help the AI by mentioning colors in your prompt. For example, you could say watercolor painting with soft blue and green tones to match the original mood of a beach photo.
Another good tip is to keep your prompts simple at first. Start with two or three descriptive words. If the result is not what you wanted, add more words one by one. If you use too many words at once, the AI might get confused and ignore some of your instructions.
Common Mistakes to Avoid
One of the biggest mistakes beginners make is using a very low resolution source image. If the AI cannot see the details in the original, it will make them up. This often leads to strange looking faces or distorted limbs in portraits. Always try to use the highest quality version of your photo that you have available.
Another common error is setting the image strength too high. People often want a big change, so they push the slider to the maximum. This usually results in an image that has nothing to do with the original photo. If you find that the AI is changing the subject too much, turn the strength down. It is better to make small adjustments and generate several times than to try and do everything in one go.
Finally, do not forget to check the background. Sometimes the AI will do a great job on the main subject but leave the background looking messy. If this happens, you can try adding words to your prompt that describe the background, such as blurred forest background or simple white studio background. This helps the AI understand that the entire image needs to be restyled, not just the person in the middle.
Conclusion
Transforming your existing images into new creative styles is a fun and rewarding process. With the help of AI, you can turn any ordinary snapshot into a work of art in just a few minutes. By following a simple step by step guide, you can control how much the AI changes your photo and ensure the final result looks exactly how you imagined.
Remember to start with a clear photo, write descriptive prompts, and find the right balance with your settings. As you practice more, you will learn which styles work best for your specific photography style. Whether you want to create unique social media posts or beautiful digital art for your home, these tools give you the power to be an artist without needing years of training. Start experimenting today and see how your old photos can take on a whole new life.

-
Rory McIlroy bites back at PGA Championship fans after unruly treatment

-
UP to Recruit Over 23,000 Teachers in Major Education Drive, Big Relief for Aspirants
-
Is Waterbirth Safe in India? What Expecting Parents Should Know

-
Can rose petals really boost collagen? Here's what research says about the viral skincare trend

-
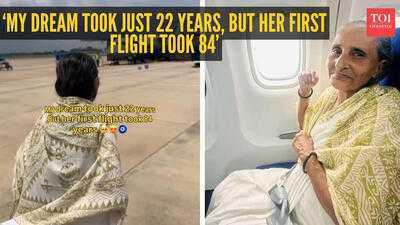
'My dream took just 22 years, but her first flight took 84': Grandmother's journey with grandson leaves internet emotional